Did you know Flutter has built-in support for l10n, also known as localization? I’ve been searching for an easy way to localize my app, but most of the blog posts I’ve found rephrased the official documentation on internationalization .
I live in Belgium where we have 3 official locales: Flemish (nl_BE), Belgian French (fr_BE) and German (de_BE). L10n is the process of supporting multiple locales. This mainly relates to translated resources and formatting differences. I18n (internationalization) means that you also support different countries and cultures (e.g. different timezones, understanding that seasons are not the same everywhere in the world, different symbols…). A great app in Belgium should be localized for at least Dutch and French.
During my job as a Xamarin developer, I regularly use Loco, a software translation management platform. Turns out this also makes localizing Flutter apps a piece of cake.
In this tutorial I’ll walk you through setting up l10n for your app and configuring a system that both developers and translators can use to localize your app with ease.
Add dependencies
To get started with l10n, add the flutter_localizations package to your pubspec.yaml:
1dependencies:
2  flutter:
3    sdk: flutter
4  flutter_localizations: # add the package
5    sdk: flutter # make it target the right SDK
6  ...
Flutter comes bundled with the en_US locale and this package adds support for more than 50 languages.
We will be using Dart’s official Intl package to make localizing strings a breeze, so add this package to your development dependencies.
1dev_dependencies:
2  ...
3  intl_translation: ^0.17.5
Run flutter packages get to make sure the dependencies are installed.
Define a class for localized resources
Just like in the official documentation, we’ll add a class that contains the logic to load the translations.
 1class AppLocalizations {
 2  static Future<AppLocalizations> load(Locale locale) {
 3    final String name = locale.countryCode == null || locale.countryCode.isEmpty ? locale.languageCode : locale.toString();
 4    final String localeName = Intl.canonicalizedLocale(name);
 5    return initializeMessages(localeName).then((_) {
 6      Intl.defaultLocale = localeName;
 7      return AppLocalizations();
 8    });
 9  }
10
11  static AppLocalizations of(BuildContext context) {
12    return Localizations.of<AppLocalizations>(context, AppLocalizations);
13  }
14}
This class loads the current locale from the device. It tries to find a locale with a matching country code, otherwise it falls back on the language.
The static of method allows us to instantiate the class based on a context from anywhere inside a build method.
Don’t worry about the missing initializeMessages method for now as we will automatically generate this.
Integrate with Flutter’s built-in l10n support
Both MaterialApp and CupertinoApp have arguments that take in a LocalizationsDelegate. This delegate is the glue between our AppLocalizations and the app.
 1class AppLocalizationsDelegate extends LocalizationsDelegate<AppLocalizations> {
 2  const AppLocalizationsDelegate();
 3
 4  @override
 5  bool isSupported(Locale locale) {
 6    return ['en', 'nl', 'fr'].contains(locale.languageCode);
 7  }
 8
 9  @override
10  Future<AppLocalizations> load(Locale locale) {
11    return AppLocalizations.load(locale);
12  }
13
14  @override
15  bool shouldReload(LocalizationsDelegate<AppLocalizations> old) {
16    return false;
17  }
18}
The load simply returns our AppLocalizations class as it will contain all the localized resources.
In the isSupported method you can define which locales your app should support (English, Dutch and French in this example).
The shouldReload method always returns false in this case. It defines whether or not all the app’s widgets should be reloaded when the load method is completed.
Next, add the LocalizationsDelegate to the app class as arguments and define the locales that our app supports:
1return MaterialApp(
2    localizationsDelegates: [
3    AppLocalizationsDelegate(),
4    GlobalMaterialLocalizations.delegate,
5    GlobalWidgetsLocalizations.delegate
6    ],
7    supportedLocales: [Locale('en'), Locale('nl'), Locale('fr')],
8    ...
9);
The order of the supportedLocales is important as this is also the order in which a fallback will occur when the device is set to an unsupported locale.
Localizing strings
Now that we have the boilerplate code out of the way, it’s time to localize a few strings.
Resources should be added at the end of the AppLocalizations class as properties with a getter.
1  String get appTitle => Intl.message('My localized app', name: 'appTitle');
2  String get welcomeText => Intl.message('Hello world!', name: 'welcomeText');
The package also has support for formatted text with arguments, plurals, genders, date and number formats etc. It’s very well documented on the Intl package readme .
Using localized resources inside a widget
The app title can be translated inside MaterialApp or CupertinoApp like so:
 1class MyLocalizedApp extends StatelessWidget {
 2  @override
 3  Widget build(BuildContext context) {
 4    return MaterialApp(
 5      localizationsDelegates: [
 6        AppLocalizationsDelegate(),
 7        GlobalMaterialLocalizations.delegate,
 8        GlobalWidgetsLocalizations.delegate
 9      ],
10      supportedLocales: [Locale("en"), Locale("nl"), Locale("fr")],
11      onGenerateTitle: (BuildContext context) =>
12          AppLocalizations.of(context).appTitle,
13      ...
14    );
15  }
16}
This is also how you can retrieve a translated resource from within a widget:
 1@override
 2  Widget build(BuildContext context) {
 3    final AppLocalizations loc = AppLocalizations.of(context);
 4
 5    return Scaffold(
 6        appBar: AppBar(
 7          title: Text(loc.welcomeText),
 8        ),
 9        ...
10        );
11  }
12}
Generating ARB files
ARB stands for Application Resource Bundle and is a file format made by Google that contains localized resources for software.
The format is based on JSON and uses ICU-like syntax. ICU, International Components for Unicode , is a widely-used internationalization library.
The Intl package can automatically generate these files which can then be used by a translation management tool.
To generate ARB files, run the following command:
1mkdir l10n
2flutter pub pub run intl_translation:extract_to_arb --output-dir=l10n lib/localization.dart
lib/localization.dart is the path where my localized strings live (the AppLocalizations class) and l10n is a folder where I want the ARB files to be generated. Make sure to create this folder using the mkdir commando first so that the folder exists. The command will fail otherwise.
This generates a file called intl_messages.arb inside the l10n folder. Take a look at the file and you’ll notice that it contains resources you mentioned in AppLocalizations.
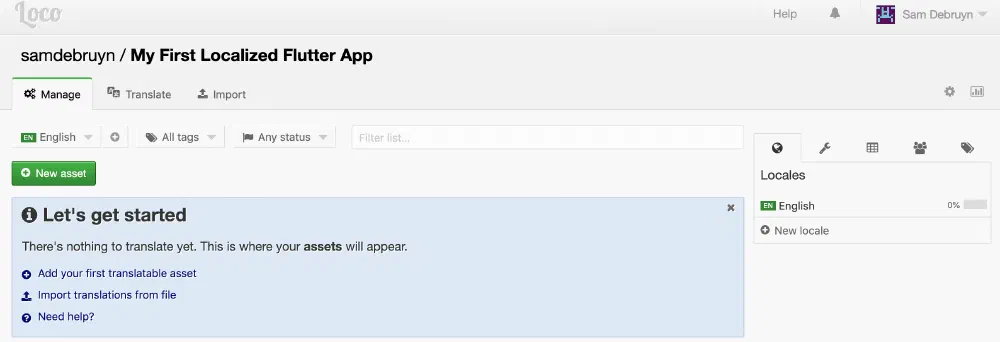
Importing in Loco
If you haven’t done so already, create an account and a new project on Loco. In the example above I’ve used English as the base language for my app, so make sure that the base language of the Loco project matches with the one used above.
By clicking on the wrench icon on right side of the page, you can open the Developer Tools section where you can create a Full access API key.
With this key, we can now upload our ARB file to Loco like so:
1curl -f -s --data-binary '@l10n/intl_messages.arb' 'https://localise.biz/api/import/arb?async=true&index=id&locale=en&key=YOURAPIKEY'
Replace YOURAPIKEY with your API key and set the locale to your default locale if it’s not en.
You can use this command and the previous one in a build script to automatically import any new translations during continuous integration. My build script is included at the end of this tutorial. There are a few other settings you can include to further streamline this process.
Now you can use Loco to translate your app to all the locales you want. The advantage is that Loco is very accessible, also to non-developers. If you’re doing a project for someone else, you can easily give them access to your Loco project and let them add the correct translations.
Exporting from Loco and generating Dart files
Our solution starts to take shape, but we’re not there yet. We still need to get our translated resources back into our app and our code doesn’t compile yet.
When you’re finished with l10n, you can export the translated resources from Loco using the following commands:
1curl -s -o 'translated.zip' 'https://localise.biz/api/export/archive/arb.zip?key=YOURAPIKEY'
2unzip -qq 'translated.zip' -d 'l10n'
This downloads the translated resources as a zip file containg ARB files and then unzips it to a folder called l10n. Both the import and the export functions are also available on Loco’s website.
Now we can run a final command to generate the Dart code that is necessary to use our new translations.
1flutter pub pub run intl_translation:generate_from_arb --output-dir=lib/l10n --no-use-deferred-loading lib/localization.dart l10n/*/l10n/intl_messages_*.arb
This matches the official documentation again and generates a messages_CODE.dart file for each locale that you support and a messages_all.dart that links them all together.
We can now resolve the remaining compile error in AppLocalizations by adding the right imports and our app is localized.
Integrating l10n in your workflow
As far as I know, Loco is the only translation platform, besides Google Translator Toolkit, that supports working with ARB files. The steps outlined in this tutorial require some muscle memory on how to add translations, but it becomes easier as soon as you integrate this into a continuous integration workflow.
This is the script I run before every build:
 1#!/bin/sh -x
 2
 3flutter packages get
 4mkdir l10n-input
 5flutter pub pub run intl_translation:extract_to_arb --output-dir=l10n-input lib/localization.dart
 6curl -f -s --data-binary '@l10n-input/intl_messages.arb' 'https://localise.biz/api/import/arb?async=true&index=id&locale=en&key=APIKEY'
 7curl -s -o 'translated.zip' 'https://localise.biz/api/export/archive/arb.zip?key=APIKEY'
 8unzip -qq 'translated.zip' -d 'l10n-translated'
 9flutter pub pub run intl_translation:generate_from_arb --output-dir=lib/l10n --no-use-deferred-loading lib/localization.dart l10n-translated/*/l10n/intl_messages_*.arb
10rm translated.zip
11rm -rf l10n-translated
12rm -rf l10n-input
It uploads any new strings that were added during my last commits and downloads the latest version of the translations so that they are included in my build.
You can also run this locally to update your local copy of the translations during development.
Questions?
Let me know if you have any questions, I’d be glad to help you out!