If you’re looking to build a simple, serverless data stack, then you might have considered the amazing combo of dbt Cloud with Neon.
Neon is a fully managed cloud offering with serverless PostgreSQL databases. They separate storage and compute, which makes it easy to scale and manage your data. If your data is not “big”, then Neon is a great choice.
dbt Cloud is a cloud-based service for running dbt. It’s a great way to run dbt without having to manage infrastructure. It features a user-friendly IDE, scheduling, and monitoring.
They form a perfect pair 🍐:
- fully serverless and cloud-based, no infrastructure needed
- easy to set up and use
- scalable and reliable
This is also what we use internally at Dataroots for our own data warehouse.
However, connecting Neon with dbt Cloud is not as straightforward as it might seem. In this post, I’ll show you how to set up a connection between Neon and dbt Cloud.
- Sign in to dbt Cloud .
- Create a new project (if you’re on the free tier, then this is your only project).

Give your project a name.
Select PostgreSQL as the type of database.
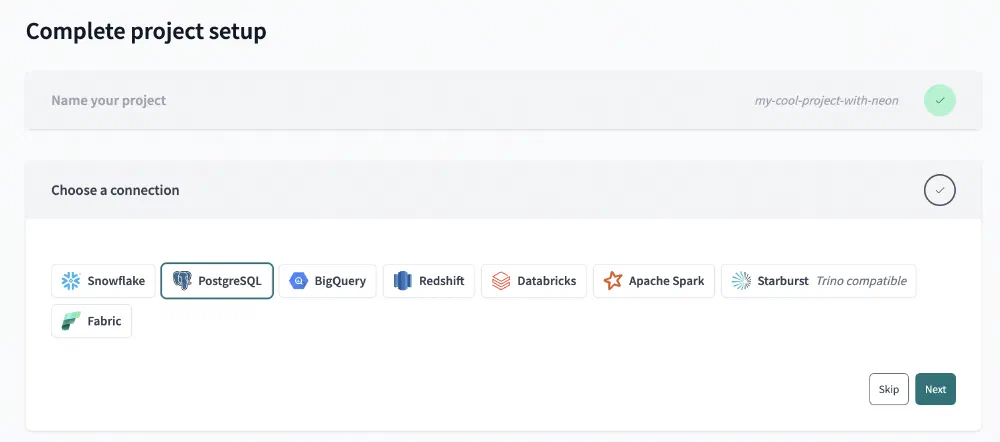
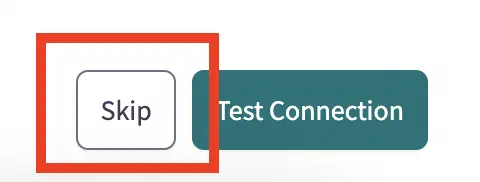
- When dbt Cloud asks you to Configure your environment, scroll to the bottom and click Skip for now. If you are on the Neon Scale plan, then take note of the IP addresses here and add them to your Neon IP Allow rules.
- Configure the git repository for your project.
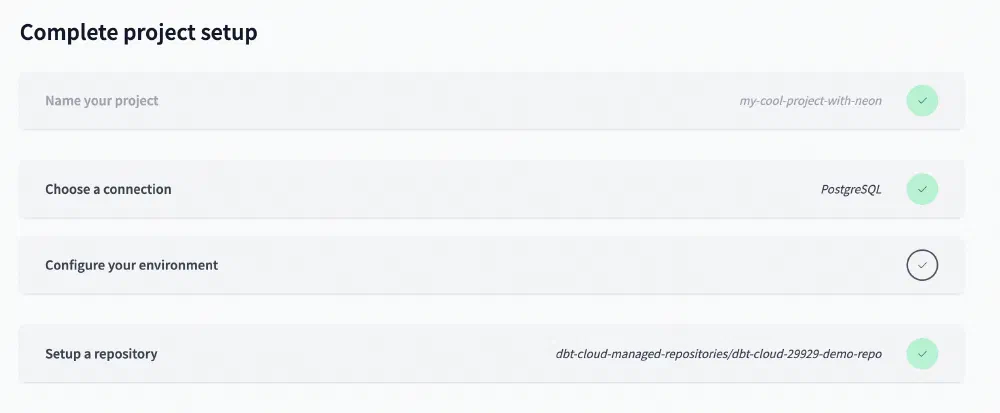
The initial setup is now completed, but we haven’t connected our Neon database yet.
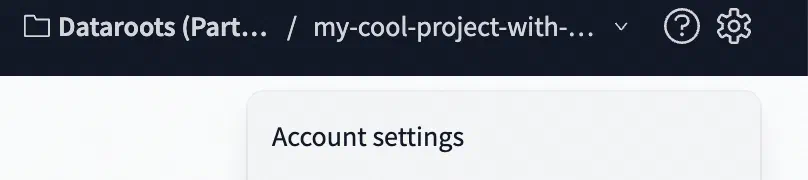
- For some reason, there is no continue button now. Click on the ⚙️ icon and select Account settings.
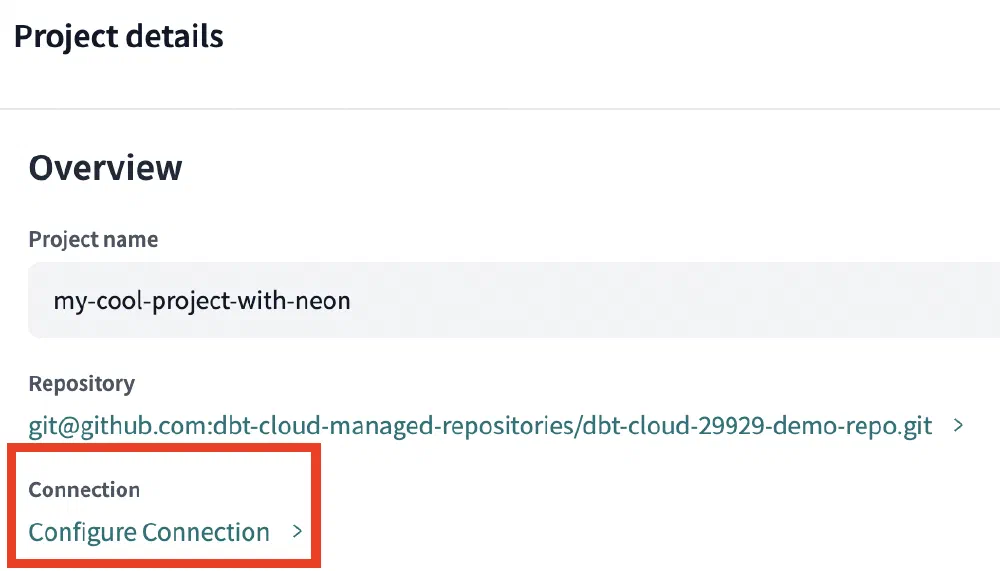
- Go to your projects, select the project you just created, and click on Configure Connection.
- Make sure to select PostgreSQL again as the type of database as dbt Cloud does not seem to remember this. Then scroll down and fill in the hostname and the name of your database of your Neon database. The port should be 5432. The hostname can be found in your Neon dashboard. Save your settings using the Save button.

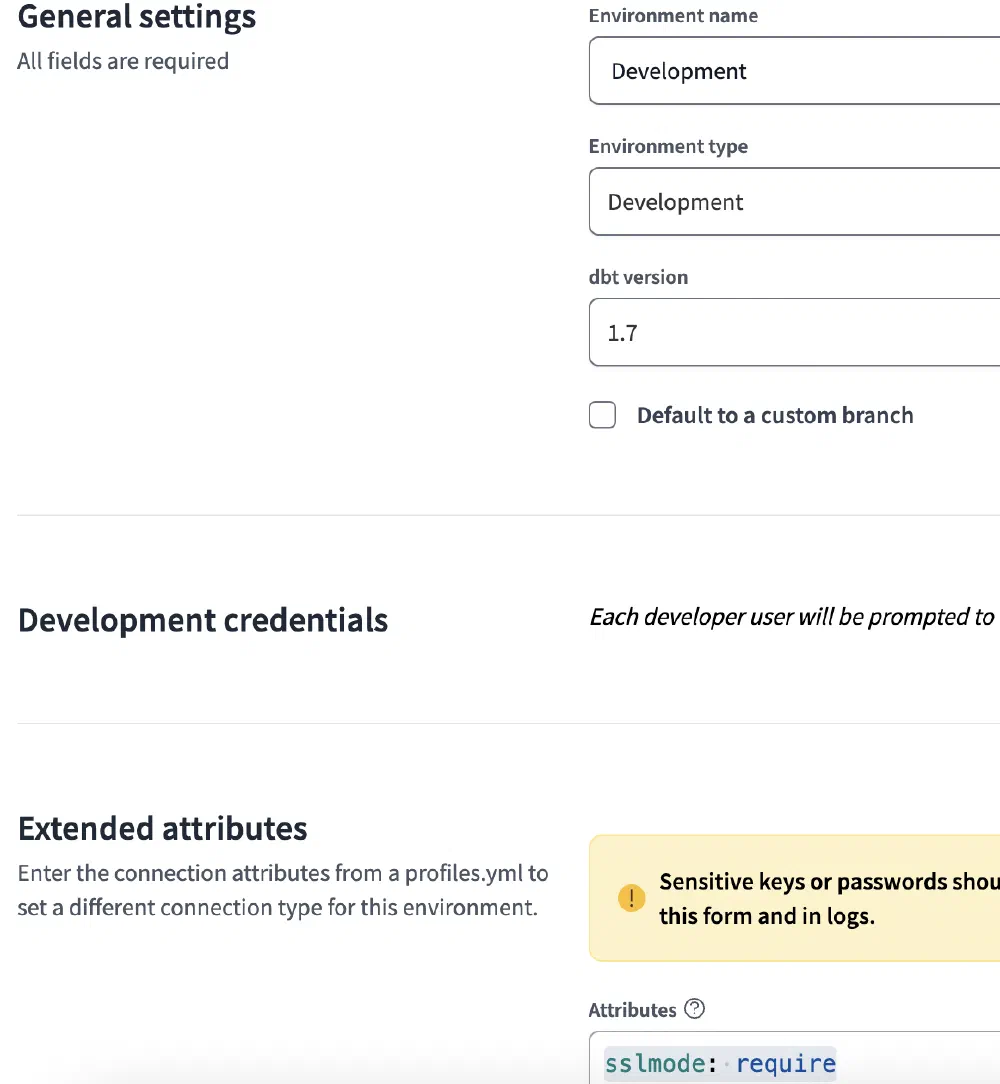
- Now click the Deploy button in the top navigation bar and select Environment.

- Click the Create environment button, give your environment the name Development and select Development as the type of environment. Put the following text in the Attributes field:
sslmode: require. Save using the Save button.
- Go back to the Deploy dropdown and select Environments again, then click on Create environment again to create a second environment. This time, name it Production and select Deployment as the type of environment. This screen also asks you for the credentials to your database. These will be used to build the dbt models in the production environment. Fill in the username as you created it in Neon.
⚠️ The password you received from Neon has to be prefixed with endpoint=<endpoint_id>; The endpoint ID is the part of the hostname you filled in earlier until the first dot. So in the example hostname ep-lucky-credit-a2i4suok.eu-central-1.aws.neon.tech, the endpoint ID is ep-lucky-credit-a2i4suok. The password should look like this: endpoint=ep-lucky-credit-a2i4suok;your-password.
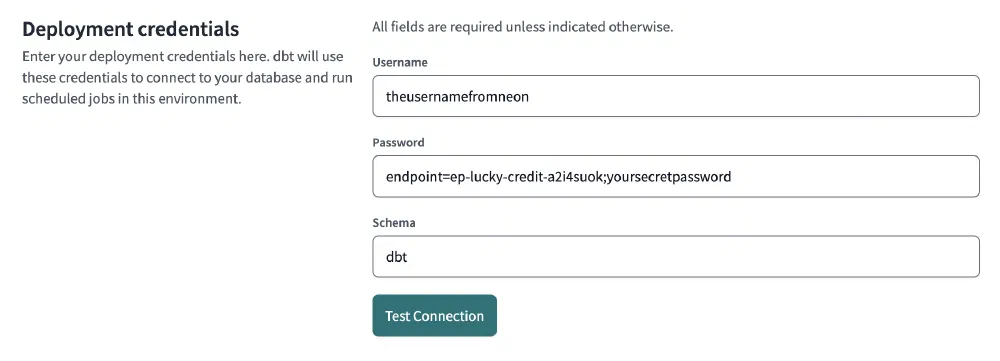
If you click the Test Connection button, you should see a success message.
Finally, choose and enter a schema for your production environment and put the following text in the Attributes field: sslmode: require. Save using the Save button. Repeat this process to create more environments as you see fit (e.g. Staging, Testing, …).
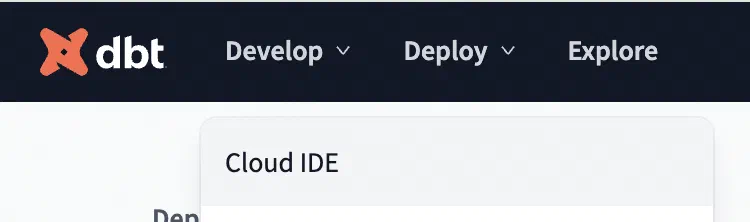
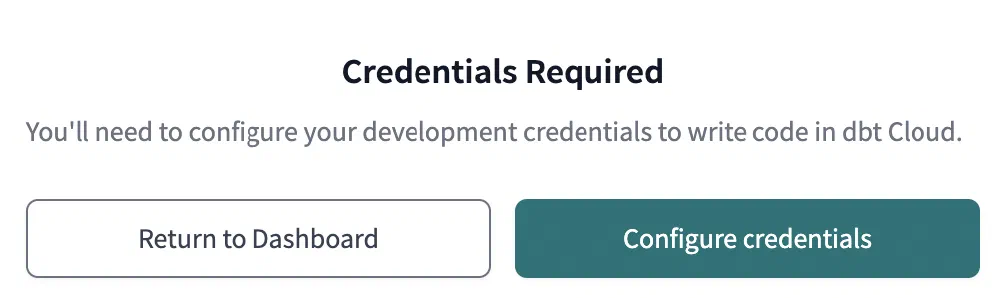
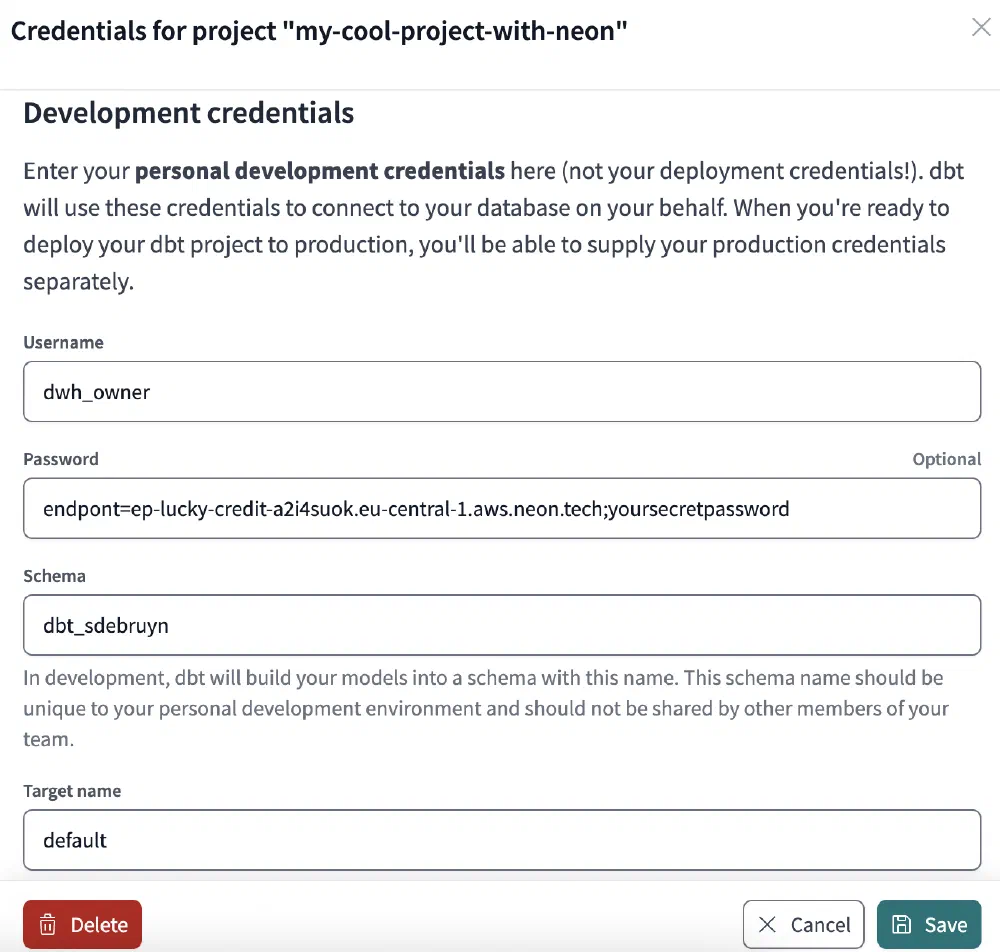
- Now, click the Develop item in the top navigation bar and select Cloud IDE. dbt Cloud will prompt you to enter your development credentials. These are the credentials used by your personal account to connect to the database. You could reuse the deployment credentials, but it’s best practice to use separate credentials for development. Click Configure credentials to continue and Edit to add your credentials.
- Just as before in step 12, fill in the username and schema as usual, but prefix your password with the endpoint ID. Click Save to store your credentials.
- You can now click the Develop button again to go the Cloud IDE and get started writing your dbt models! 🎉