Microsoft recently added support to authenticate to OneLake using service principals and managed identities. This allows users to access OneLake from applications without having to use a user account. Let’s see how this works.

Enabling the feature
2 new settings in the Fabric / Power BI Admin Portal need to be enabled for this feature to work. Both can be found in the Tenant settings section.
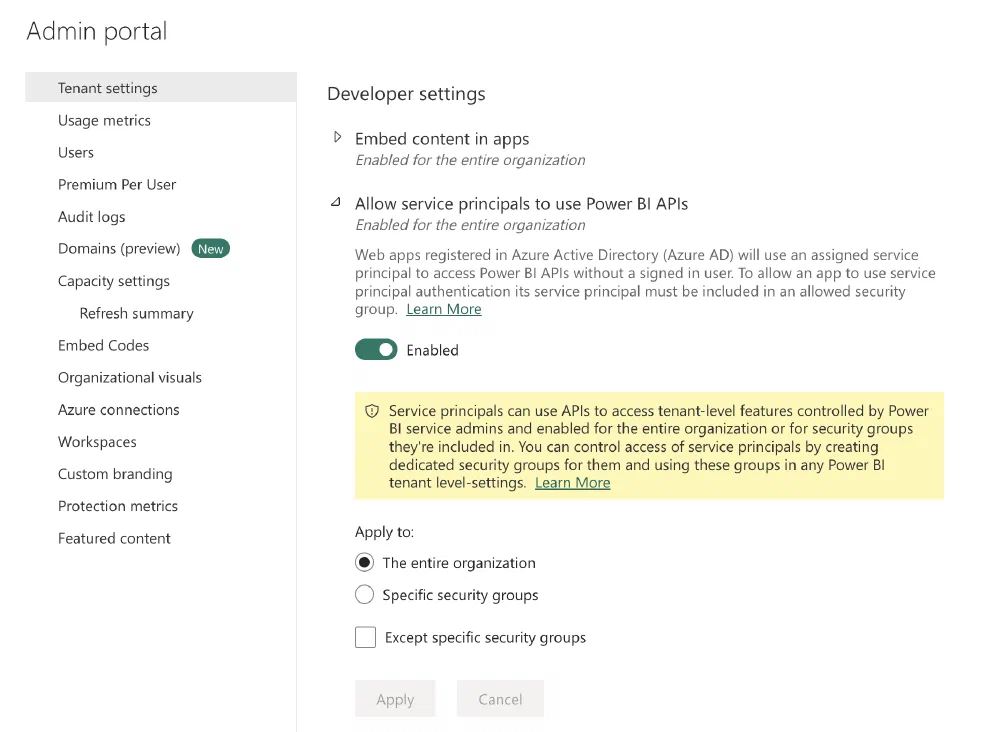
The first one is named Allow service principals to use Power BI APIs and can be found under Developer settings. This setting allows service principals to be given access to OneLake and all future Microsoft Fabric APIs as well as all current Power BI APIs. Do note that this setting by itself does not grant any access. It only allows you and your organization to give access to service principals as you already could for users and groups. This can be enabled for all service principals in your Microsoft Entra ID (Azure Active Directory) tenant or only for service principals that are members of a specific group.
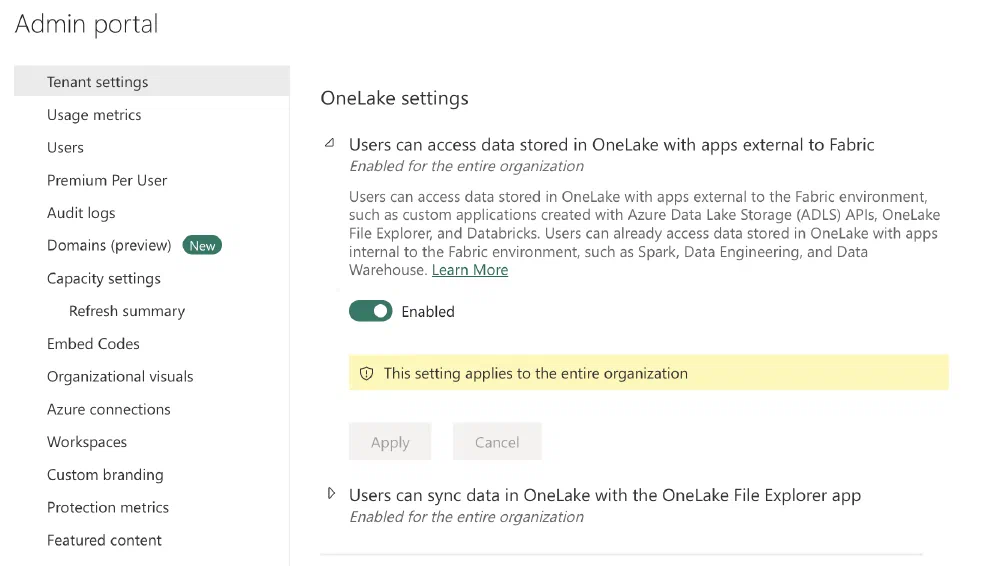
The second setting can be found a bit further down under OneLake settings. This setting allows you to use non-Fabric applications like a Python SDK, Databricks, and more to read and write to the OneLake.
Granting access to a service principal
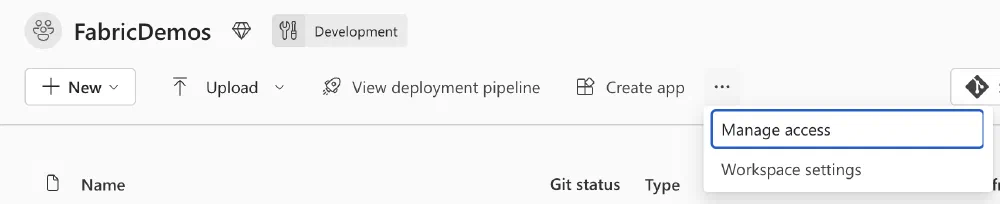
Now that the feature is enabled, you can grant access to a service principal or managed identity to connect to your Fabric Workspaces. Go to the Workspace you’re giving access to and click on Manage access.
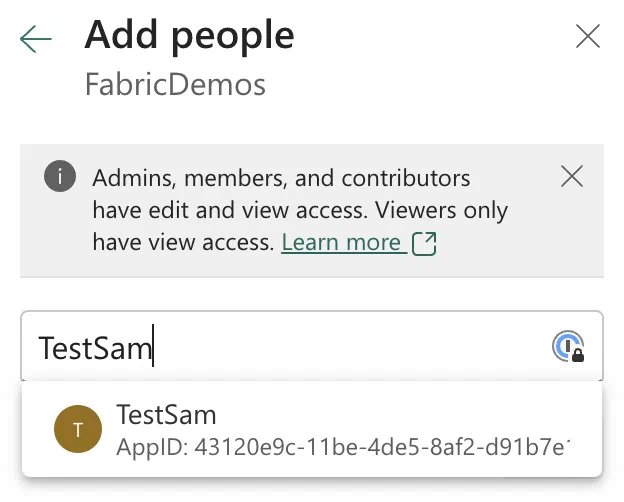
Next, click on + Add people or groups and start typing the name of your service principal or managed identity. It should pop up in the list of suggestions. Select it and click on Add.
Finally, decide on the level of access you’d like to grant to your service principal or managed identity. A quick overview of the possibilities there:
Admin: Full access to the Workspace, including the ability to delete the Workspace. You probably don’t want to give this to your service principal.
Member: Full access to the Workspace, except for the ability to change workspace settings or add new members.
Contributor (recommended): The contributor can perform most tasks except for adding other members or sharing items. This is the lowest security level you need to access OneLake through the API.
Viewer: The viewer can only view items in the Workspace, run SQL queries, or start data pipelines. Viewers cannot access OneLake through the API.
Example using Python
Let’s see how we can use this in practice. You can create a new service principal using the Azure CLI using the command az ad sp create-for-rbac -n "Fabricator". This will create a new service principal with the name Fabricator and output the following information:
1{
2  "appId": "xxxxxxxx-xxxx-xxxx-xxxx-xxxxxxxxxxxx",
3  "displayName": "Fabricator",
4  "password": "xxxxxxxx-xxxx-xxxx-xxxx-xxxxxxxxxxxx",
5  "tenant": "xxxxxxxx-xxxx-xxxx-xxxx-xxxxxxxxxxxx"
6}
The appId is the client ID and the password is the client secret. You can use these to authenticate to OneLake using the Python SDK.
We need 2 Python packages to get started: azure-identity and azure-storage-file-datalake. You can install them using pip install azure-identity azure-storage-file-datalake.
In your Python code, you can now use the following code to authenticate to OneLake:
 1from azure.identity import ClientSecretCredential
 2from azure.storage.filedatalake import FileSystemClient
 3
 4cred = ClientSecretCredential(tenant_id="<your-tenant-id>",
 5                              client_id="<your-client-id>",
 6                              client_secret="<your-client-secret>")
 7
 8file_system_client = FileSystemClient(
 9    account_url="https://onelake.dfs.fabric.microsoft.com",
10    file_system_name="<name-of-the-workspace-you-want-to-access>",
11    credential=cred)
12paths = file_system_client.get_paths(path="/<name-of-the-lakehouse>.Lakehouse/Tables/")
13for p in paths:
14    print(p.name)
The code above would go through all the tables in your Lakehouse and print their physical paths. These are just GUIDs and not very useful, but you can use them to access the data in your Lakehouse.
You can access your OneLake data at the following paths:
/<name-of-the-lakehouse>.Lakehouse/Tables/for the tables in your Lakehouse (this also includes Shortcuts)/<name-of-the-lakehouse>.Lakehouse/Files/for the files in your Lakehouse (this also includes Shortcuts)/<name-of-the-warehouse>.Warehouse/Tables/for the tables in your Warehouse
You could now use any of the libraries you already know like Pandas, Spark, Polars, or the Delta Lake library to directly access your data.